
1. Background / Design
SAP recommends using OAuth2.0 authentication for the authentication of API applications, since HTTP Basic Authentication is deprecated.
SAP OData OAuth 2.0 authentication is using the OAuth SAML2.0 Assertion flow for authentication, requiring an external IDP service to generate a signed SAML assertion, to be used in the request towards the SAP SuccessFactors API server.
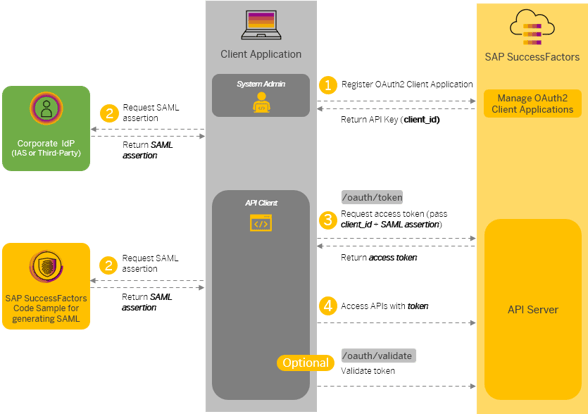
Figure 1 – Description of the SAP documentation.
In this document, the setup will be described with SAP IAS for dynamically generating the SAML assertion, instead of using other 3rd-party IDPs.
The following screenshots show the setup using Okta Workflows as the API client application to handle the API calls between SAP SuccessFactors and IAS.
2. Setup
2.1 Prerequisites
-
SAP SuccessFactors is configured with IAS Federation.
-
A SuccessFactors API user is created with the same username in SuccessFactors and IAS.
-
A copy of the SAP IAS signing certificate (see below).
2.1.1 Retrieve the SAP IAS signing certificate
In IAS, the Signature Certificate can be retrieved from the tenant settings. From the Admin Dashboard, go to "Applications & Resources" and there to “Tenant Settings”. In the tenant settings, the signing certificate can be retrieved in “Single Sign-On” “SAML 2.0 Configuration” Signing Certificates.
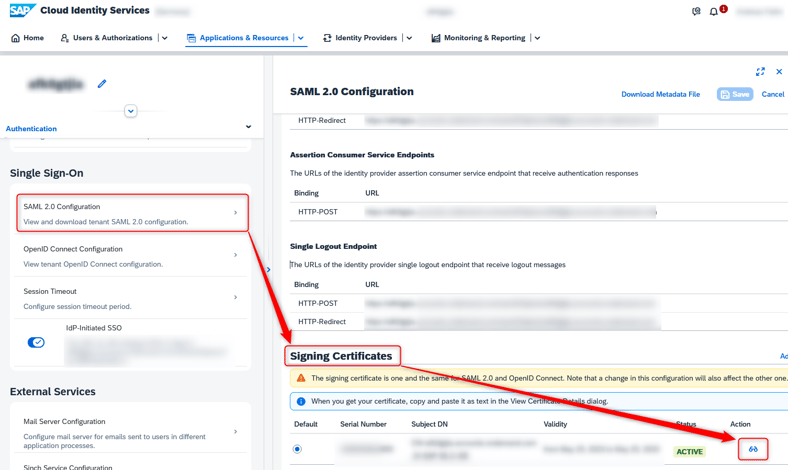
Figure 2 – Certificate Information of SAP IAS Signing Certificate.
Clicking on the “Lens Icon” ( ) opens the certificate information. Copy the text from the “Certificate Information” section:

Figure 3 – Detailed Certificate Information of SAP IAS Signing Certificate.
Note: If there are multiple signing certificates, choose the one that will be used in the SAML2.0 application, created in the following steps.
2.2 SuccessFactors
Create an OAuth2 Client application in the API center.
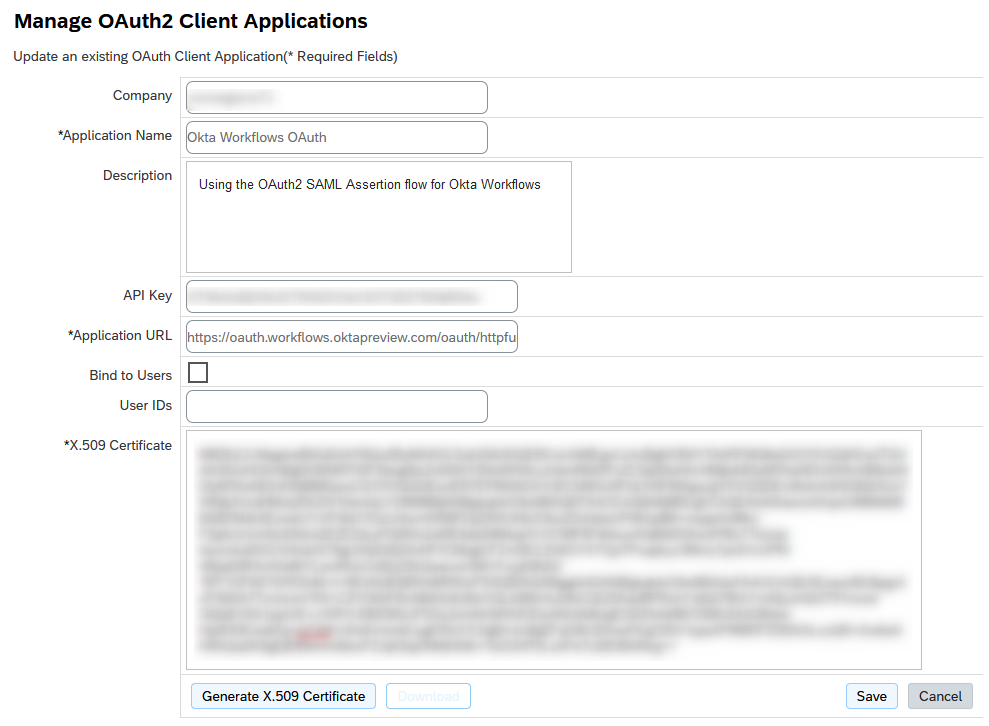 Figure 4 – OAuth2 Client Application Settings
| Name | Value |
| Company | <SAP SF company> |
| Application Name | Custom application name |
| Description | Custom description |
| Application URL |
Application URL for the OAuth flow. Okta workflows1 (Preview) https://oauth.workflows.oktapreview.com/oauth/httpfunctions/cb (Production) https://oauth.workflows.okta.com/oauth/httpfunctions/cb |
| Bind to users | Optional |
| x.509 certificate | Let SuccessFactors generate it. Will be changed later. |
| API key | Copy after creation of the application. Will be required later. |
1Okta Workflows OAuth Reference
2.3. IAS Application
The next step involves creating an application in IAS. This application serves as the endpoint for retrieving the SAML assertion, which will be used to obtain the SuccessFactors Access Token. The IAS application will handle both SAML and OAuth requests.
2.3.1 Create an IAS SAML Application.
IAS Admin Applications & Resources Applications Create.
Settings:
| Name | Value |
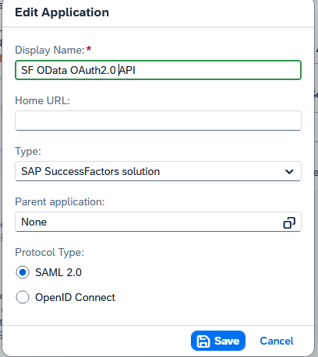
| Display name | <custom> |
| Home URL | <empty> |
| Type | <optional> ("custom" types might be charged) |
| Parent application | None |
| Protocol Type | SAML 2.0 |
2.3.2 SAML 2.0 Configuration
The SAML application needs to be configured with the token URL from SuccessFactors. This step is essential to enable the application to generate a SAML assertion with the URL in the "Recipient".
<select previously created application> Trust Single Sign-On SAML 2.0 Configuration.
| Name | Value |
| Name | <custom> |
| URL for Principal Propagation |
SFAPI token URL (<SF endpoint>/oauth/token) For preview (example): https://api2preview.sapsf.eu/oauth/token For production (example): https://api2.successfactors.eu/oauth/token |
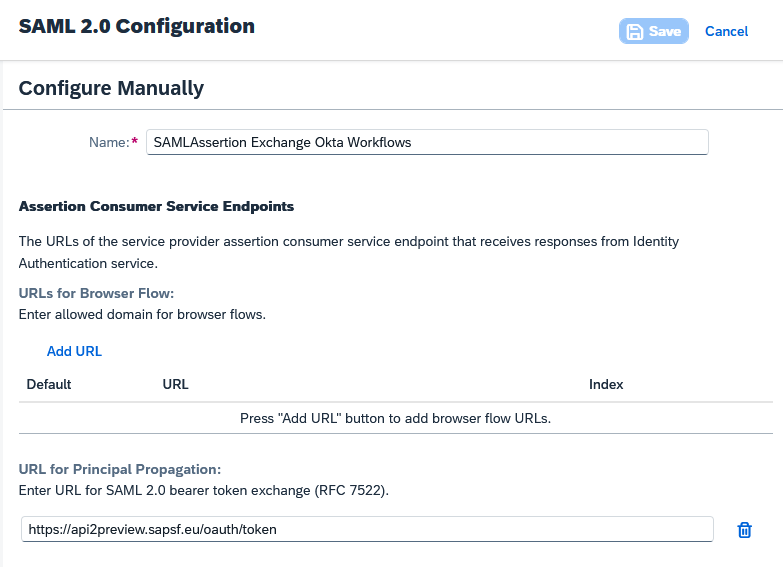 Figure 5 – SAML 2.0 Configuration
2.3.3 Subject Name Identifier and Default Name ID Format
Select the attribute that matches the username of the API account in SuccessFactors.
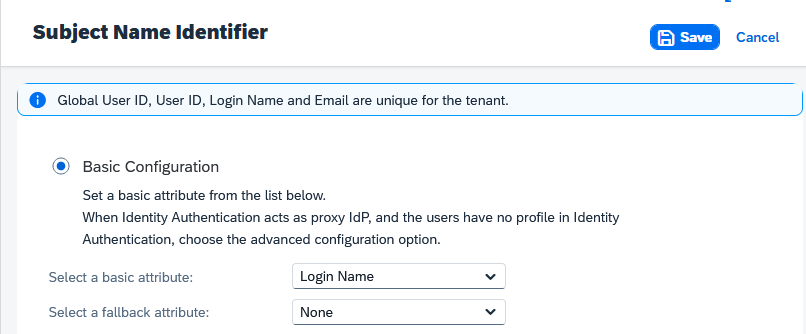 Figure 6 – Subject Name Identifier – Example Configuration.
Default Name ID format is “unspecified / urn:oasis:names:tc:SAML:1.1:nameid-format:unspecified” (Default value).
2.3.4 Attributes
All default attributes can removed here. One additional attribute is added ("api_key") so the SAML assertion will be created with this attribute included.
| Name | Source | Value |
| "api_key" (case-sensitive) | Expression | <API key copied from SF OAuth2 Application created earlier> |
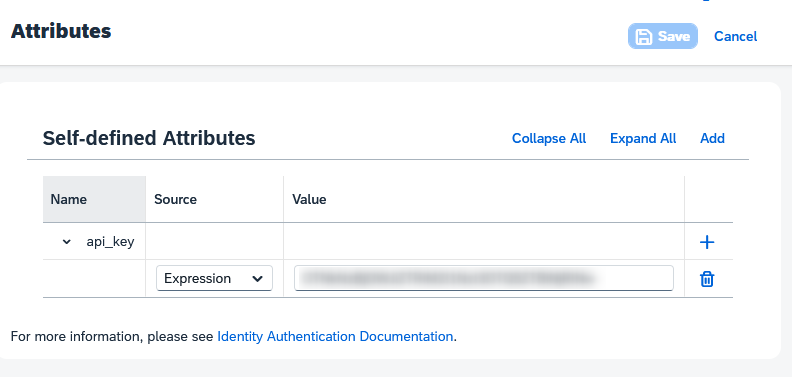
Figure 7 – Attributes values
2.4 Allow Token Exchange Flow
After creating the application, the app needs to allow the Token Exchange OAuth2 grant. To do this, temporarily change the app to “OpenID Connect”.
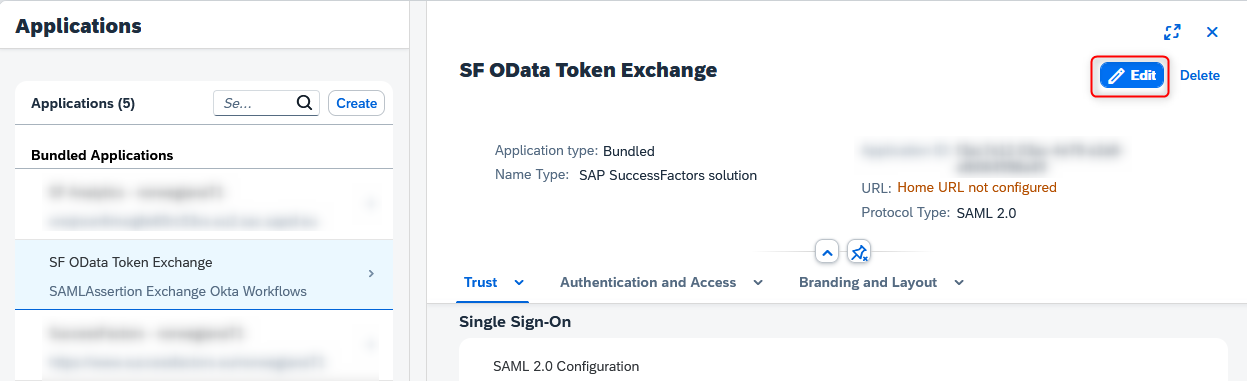 Figure 8 - Change the app settings by clicking on "Edit" in the app overview.
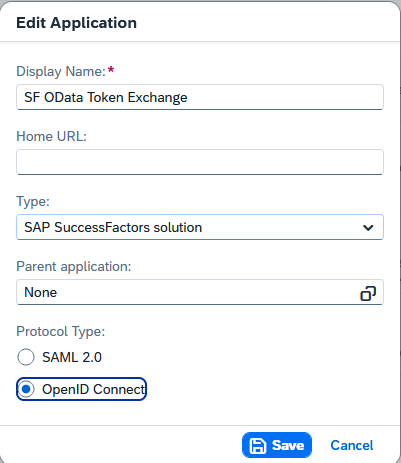 Figure 9 – Change the app from "Protocol Type" "SAML 2.0" to "OpenID Connect".
After the app has been changed to OpenID Connect, go to “OpenID Connect Configuration” on the app and change the “Grant Types” to allow only “Password” and “Token Exchange (RFC 8693)” flows.
 Figure 10 – Location of the Grant Types for the OpenID Connect Configuration Flows.
Save and change the app back to “SAML2.0”. Otherwise the Token Exchange flow will not work with this app:
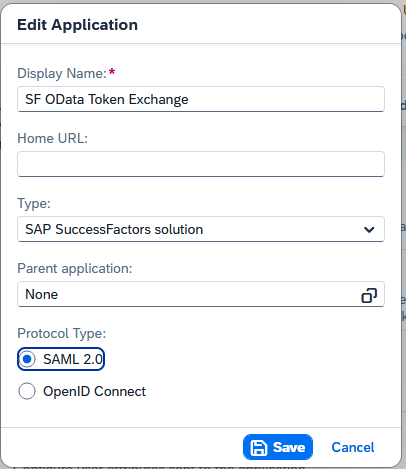 Figure 11 – App setting back to "SAML2.0".
2.5 Applications APIs – Client Authentication
Lastly, we need to create a form of authentication to create the initial IAS Access Token. In our example we will be using a simple secret.
<select previously created application> Application APIs Client Authentication.
Create Secret (settings according to company policies).
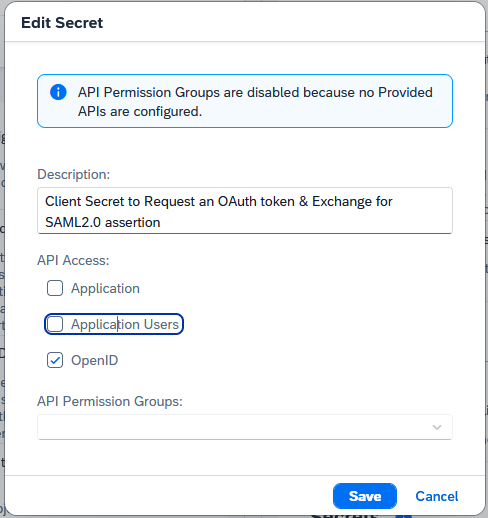
After the creation, copy ClientID and ClientSecret.
